Workbook or Reference Guide?
 Two of the most common questions we are asked about training materials are:
- ‘Isn’t it better to provide electronic versions of the materials on-line?’
- ‘How do we ensure workbooks are used and prove to be useful resources to our learners when they have left their workshop?’
‘Isn’t it better to provide electronic versions of the materials on-line?’
My response is a categoric No.
We know that people never look at these again once they have them. Mainly because they contain nothing directly relating to them personally. When learners make notes in their own workbook, they note those things that directly relate to their work situation ie things they can start to implement. Plus, the physical act of writing helps embed this into their long-term memory.
‘How do we ensure workbooks are used and prove to be useful resources to our learners when they have left their workshop?’
First, you need to decide whether it’s a workbook you’re providing ie a book that can be:
- used during the workshop
- written/drawn in
- used for notes etc
or a reference guide ie packed with technical information and know how.
As a trainer, I think we need to provide a workbook. We can always supplement workbooks with reference guides. Unfortunately, reference material does not often lend itself to the structure of most workshops (and tends to be a bit ‘dry’).
As you design your workbook, remember that the purpose of the workbook is to encourage learners to make notes that are meaningful to them.
13 Ideas to help you design learner focused workbooks
1 Have a strong, interest grabbing title on each page eg
- Instead of ‘Formatting’ in a software course, use ‘How To Make Text Look The Way You Want It To’.
- Instead of ‘Difficult People’ in a presentation course, use ‘How to Handle a Hot and Spicy Audience’.
2 Break the workbook into sections – we use:
- blue at the beginning with orientation info like table of contents, objective setting etc
- white in the middle for ‘must know’
- yellow at the back for Nice to Know that contains additional resources and additional reference documentation.
 3 Include plenty of white space for learners to make their own notes.
4 Include a Hook Page – ie show the relevance (context) of the topic (keep it light and brief).
5 Include a FAQ page towards the front answering workshop and topic related questions.
6 Include ‘real‘ photographs taken in their workplace to give a sense of context to the topic and material.
7 Include a ‘mind-map’ page at the beginning to give an overview of the workshop.
8 Include a Learners Objectives page at the beginning where learners can write their own objectives to be discussed with other learners at the beginning of the workshop.
9 Leave one side of the page blank for notes, but put a big graphic in the corner saying ‘Notes’ – this can be a relevant graphic for the workshop.
10 Leave blanks on pages so that learners can fill in the missing words eg 3 questions to answer Yes to for a successful opening are:
- Does it break ___________,
- Does it facilitate __________,
- Is it relevant to the ________
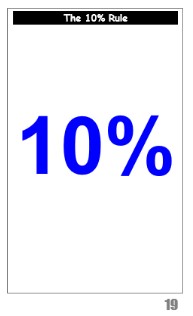
 11 Place a large graphic on the page or a single word, we do this with things like 10% or 90/20/8. This generates curiosity and gets learners writing on the workbook.
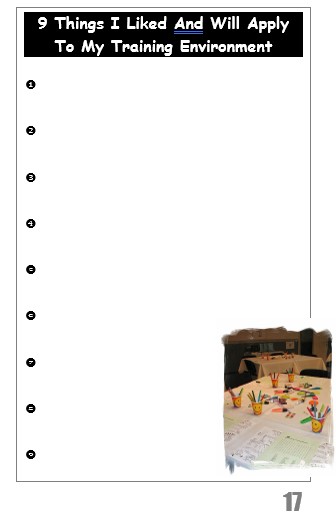
12 Put boxes on certain pages such as ‘3 places I can use these ideas are’, ‘My department use this feature on a daily basis for the following’ etc In other words, get learners writing how they will use a new idea – making it relevant for them.
13 Have an action list page towards the back labelled ‘What 3 things I will use from this workshop within the next 7 days’.
Call to action |
|---|
| Make it a true workbook where learners can write their thoughts, ideas that are specific to their work and how/where they’ll use these ideas in the workplace. This way they know what’s in the workbook, they have noted all the ideas that are useful to them and you can almost guarantee the workbook will be used over and over again. |